Loading version...

Your glucose.
At a glance.

A pocket-sized, open-source CGM display that puts real-time glucose data where you need it. Built for the diabetes community, by the diabetes community. No subscriptions. Just ~$40.

~$40
Total hardware cost
Dexcom
CGM source · live now
+2
Sources in dev
Libre · Nightscout
0
Subscriptions required
CYGM device showing glucose reading and weather on a yellow 3D-printed case

Everything you need.
Nothing you don't.

Designed from the ground up for one purpose — making glucose data visible, accessible, and actionable.

📊

Real-Time Glucose

Live readings from Dexcom Share, Nightscout, or LibreLinkUp. Large, clear numbers with trend arrows you can read across a room.

📈

6-Hour Trend Graph

Interactive touchscreen graph with target range markers. Tap any point to see the exact reading and timestamp.

🔔

Customizable Alarms

Set high/low thresholds with audio tones, visual LED alerts, and repeat-until-dismissed mode. Choose from 12+ 8-bit alarm sounds.

🌤️

Weather & Clock

Integrated weather display with automatic timezone detection, sunrise/sunset times, and location search — all on the home screen.

🔋

Battery Powered

Built-in battery monitoring with percentage display. Charge via USB-C and take it anywhere — nightstand, desk, or on the go.

📱

Touchscreen UI

2.8" capacitive touchscreen with full on-device keyboard for setup. No phone or computer needed after initial firmware flash.

CYGM device in purple case on a mantle

Built because it
needed to exist.

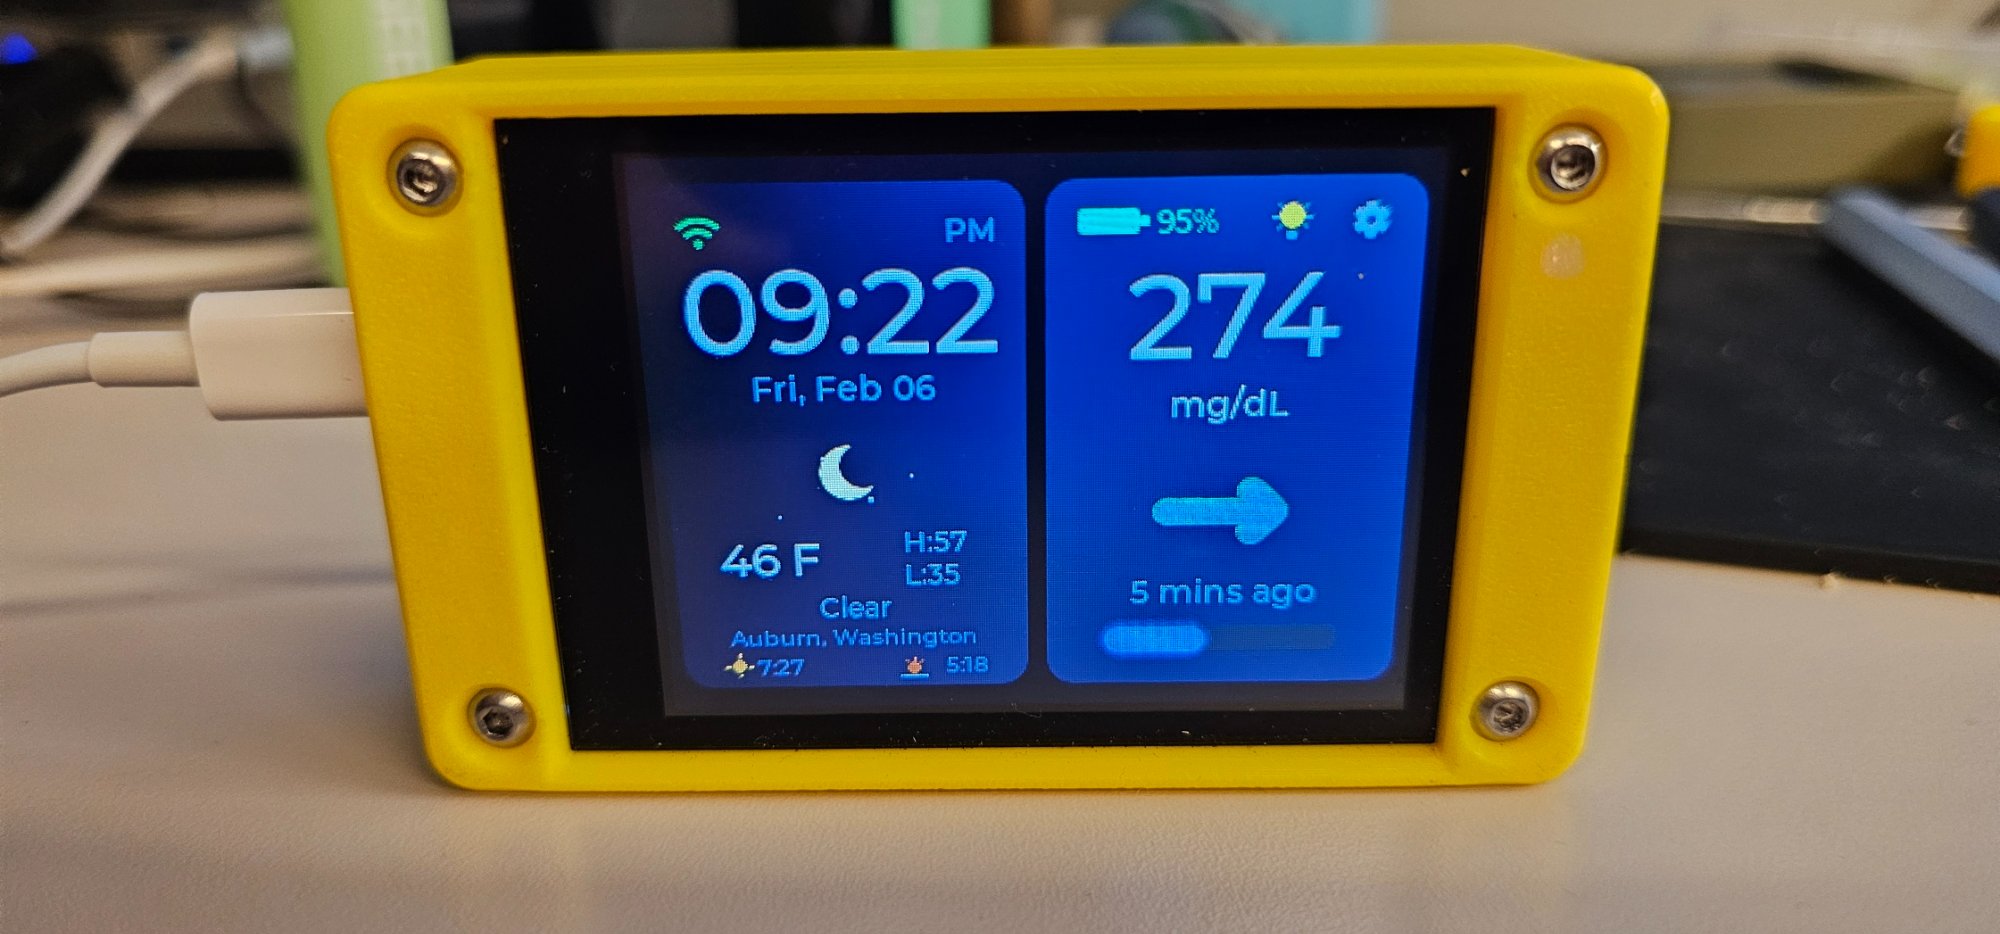
CYGM was born from a simple frustration: why does seeing your glucose data have to be expensive? Commercial CGM displays cost hundreds of dollars, require subscriptions, and lock you into ecosystems.

I'm Carl — a self-taught developer, a member of the diabetes community, and someone who believes technology should serve people, not profit margins. I started with a $20 ESP32 development board, a 2.8-inch touchscreen, and a lot of late nights learning embedded programming through trial and error.

CYGM is fully open source. No subscriptions, no accounts, no cloud dependency. Just a small device that does one thing really well — putting your glucose reading where you can see it. Every line of code, every schematic, every 3D-print file will be available for the community to use, improve, and share.

#WeAreNotWaiting

Small device.
Big capability.

Built on the JC2432W328 development board with ESP32-D0WD.

2.8"
Touchscreen
320×240
Resolution
WiFi
Connectivity
USB-C
Charging
ESP32
Processor
4MB
Flash Storage
RGB
LED Alerts
8-Bit
Speaker Audio

A display for every context

Whether it's your nightstand or a nursing station, CYGM fits right in.

🛏️

Bedside Monitor

Place it on your nightstand. See glucose readings at a glance without reaching for your phone. Night-time alarms wake you when levels are off.

🏫

School Nurse's Office

Give school staff visibility into a student's glucose without needing their phone. A simple, dedicated display that anyone can read.

🏥

Clinic or Care Facility

Affordable enough to place at every nursing station. Monitor residents with CGMs from a small, always-on display right at the desk.

Ready to build in minutes

Everything you need is available off the shelf. Order the parts, flash the firmware from your browser, and you're done — no soldering, no coding, no complicated setup.

📟

ESP32 Display Board

2.8" touchscreen development board with WiFi, USB-C, and microSD slot. The heart of CYGM.

~$20
View on Amazon →
🔊

Mini Speaker

1W 8Ω full-range speaker with JST-PH 1.25mm connector. Plugs right in for alarm sounds.

~$8
View on Amazon →
🔋

3000mAh Battery

Rechargeable LiPo battery for portable use. Our 3D-printed case is designed to fit this exact size.

~$12
View on Amazon →

Flash your device

Install or update CYGM firmware directly from your browser. No software to download — just plug in and go.

cygm-flasher
How to enter flash mode
1

Press and hold both buttons, then release

Press and hold BOOT and RESET together for 1 second, then release both buttons.

2

Verify boot mode

Your device screen should be OFF, with the LED glowing slightly red. This means the device is in boot mode and ready to flash.

3

Select firmware & click Install

Choose your firmware version below, then click Install Firmware. Select your device's COM port when the browser asks.

4

Hold BOOT when prompted

The terminal will show instructions. When ready, hold the BOOT button and click the confirmation. Keep holding BOOT until flashing starts, then release it.

5

Wait for completion

Watch the progress bar. Do not unplug until complete. The device will reboot automatically when finished.

💡
Don't worry — this is safe!

If you accidentally entered boot mode or weren't ready, just press the RESET button to wake the device back up. You can't break the device this way — it's completely safe to experiment.

Current Version Loading...
Release Date
Stage
Flashing firmware... 0%
Before you start (quick checklist):
  1. Enter boot mode: hold BOOT + RESET for 1 second, then release both.
  2. Click Install and select your CYGM COM port.
  3. When prompted, choose Install CYGM (or Logs & Console if you only need diagnostics).
  4. Do not choose “Erase Device” unless you intentionally want to wipe all settings and saved data.
  5. Hold BOOT while clicking Install; when the percentage/progress appears, release BOOT.

Requires Chrome or Edge on desktop · Uses Web Serial API

{ "status": "idle" }
Recovery steps

If flashing fails, unplug USB, hold BOOT + RESET for 1 second, release both, reconnect USB, then retry.

💻

Firmware Upgrade Requires a PC

To flash firmware to your CYGM device, you'll need to use a desktop or laptop computer with Chrome or Edge browser.

The firmware flasher uses the Web Serial API to communicate directly with your device via USB — this technology is only available on desktop browsers for security reasons.

Chrome or Edge on Windows/Mac/Linux
USB-C cable for device connection
About 2-3 minutes for the flash process
A CYGM device (JC2432W328 board), a USB-C cable, and a desktop computer running Chrome or Edge. No drivers or software installation needed — everything happens in the browser.
A full flash (merged binary) will reset all settings to defaults. After flashing, you'll go through the on-device setup wizard to configure your WiFi, CGM source, location, and alarm preferences.
Make sure your USB cable supports data transfer (not charge-only). Try a different USB port. Follow the boot mode instructions above: hold BOOT + RESET for 1 second, release RESET while keeping BOOT held, then click "Install Firmware" in the browser. If the browser still doesn't see the device, you may need the CP210x USB driver from Silicon Labs.
Not currently. The Web Serial API is only supported in desktop browsers (Chrome and Edge). We're working on an SD-card based update method that won't require a computer at all.